There are few fundamental differences among pressure cookers because they all work on the same basic principle. The following diagrams illustrate the basic features of most newer pressure cookers. Of course, you'll also want to carefully study your pressure cooker’s instruction manual to get acquainted with exactly how it works.
To get started, familiarize yourself with the following key parts of a pressure cooker as identified in the diagrams below.
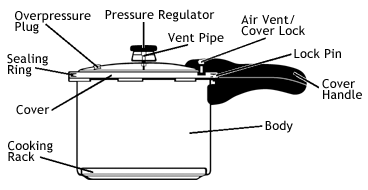
Pressure Regulator
Controls and maintains pressure inside the cooker and indicates when the
cooking pressure -- usually 15 pounds -- is reached.
Vent Pipe
The pressure regulator fits on the vent pipe and allows excess pressure to be released.
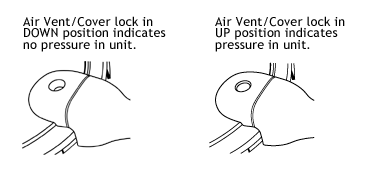
Air Vent/Cover Lock
Automatically exhausts air from inside the cooker and serves as a visual indicator
of pressure within the cooker. When pressure begins to build, the air vent/cover
lock slides up, causing the LOCK PIN to lock the cover in place.
Sealing Ring
Forms a pressure-tight seal between the cover and the pressure cooker body during cooking.
Over Pressure Plug
Automatically releases pressure (if necessary, as a safety measure) in the unlikely
instance the vent pipe would become clogged and pressure could not be released
normally.
Cooking Rack or Basket
Raises foods out of the cooking liquid. It also allows foods to be separated
so their flavors will not intermingle when they are cooked at the same time.
When a blending of flavors is desired, the rack or basket is not used.
Be sure to visit our Videos page where Merle Ellis shows you the key parts of a typical pressure cooker and explains how they work while preparing a spare rib recipe.
The Pressure Cooking Method...
These easy steps serve as a simple guide to using a pressure cooker. They are not intended, however, to be a substitute for the manufacturer’s instructions that accompany your pressure cooker model.
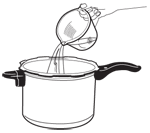 |
1. Check recipe for specific instruction and cooking time. Use the cooking rack or basket if desired. Pour required amount of liquid into the pressure cooker and add food. |
|
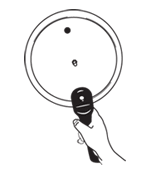 |
2. Before closing the cover, hold it up to the light and look through the vent pipe to make certain it is clear. | |
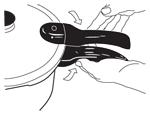 |
3. Place cover securely on pressure cooker according to your manufacturer’s instructions. | |
 |
4. Place pressure regulator on vent pipe. Heat pressure cooker to 15 pounds pressure using a high stovetop temperature setting. (Note: As pressure is building inside the cooker, air is being exhausted out of the air vent. Once the air is exhausted, the cover lock will rise and remain locked until pressure is safely reduced.) Depending upon your model, 15 pounds pressure is reached when the pressure regulator begins to rock OR when a slow, steady release of steam is seen or heard OR when the pressure indicator rises to the 15 pounds pressure mark. Reduce the heat setting to maintain 15 pounds pressure. Cooking time begins as soon as 15 pounds pressure is reached. |
|
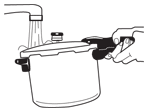 |
5. If the recipe states “cook 0 minutes,” cook food only until 15 pounds pressure is reached and cool the cooker as specified. Always cook for the length of time stated in the recipe and reduce pressure as directed. When recipe states "let pressure drop of its own accord," remove cooker from heat and set aside to cool naturally. When recipe states "cool cooker at once," cool immediately in a sink under cold running water or by placing it in a pan of cold water until pressure is completely reduced. If your model features a quick cool release button, use according to your manufacturer’s instructions. |
|
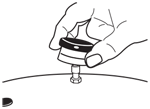 |
6. Pressure is completely reduced when the air vent/cover lock has dropped. Remove the pressure regulator. Then, remove pressure cooker cover and serve food. |
The Presto® Pressure Cooker is the perfect solution to fast, healthy, and satisfying meals!
